Position View: Job Post
The Project Job Post is an Add On Service for Pro Tier Firms. The Job Post selections must be requested and turned on by the Firms’ Account Manager.
In this support article we will walk you through setting up the Job Post feature in order to share new projects with your top candidates directly, with ease.
Inside of the Project, users can click on the Link Icon to open the Job Posting Panel.

Select your desired settings and requirements for the job posting page. Then click Generate to create the link needed for the Job Posting page.

After generating the post page, Users can view the Job Post by clicking on the created link or click “Copy” and paste the link in the URL.

Users can see the client’s company and logo. The firm’s logo will be displayed on the page as well.
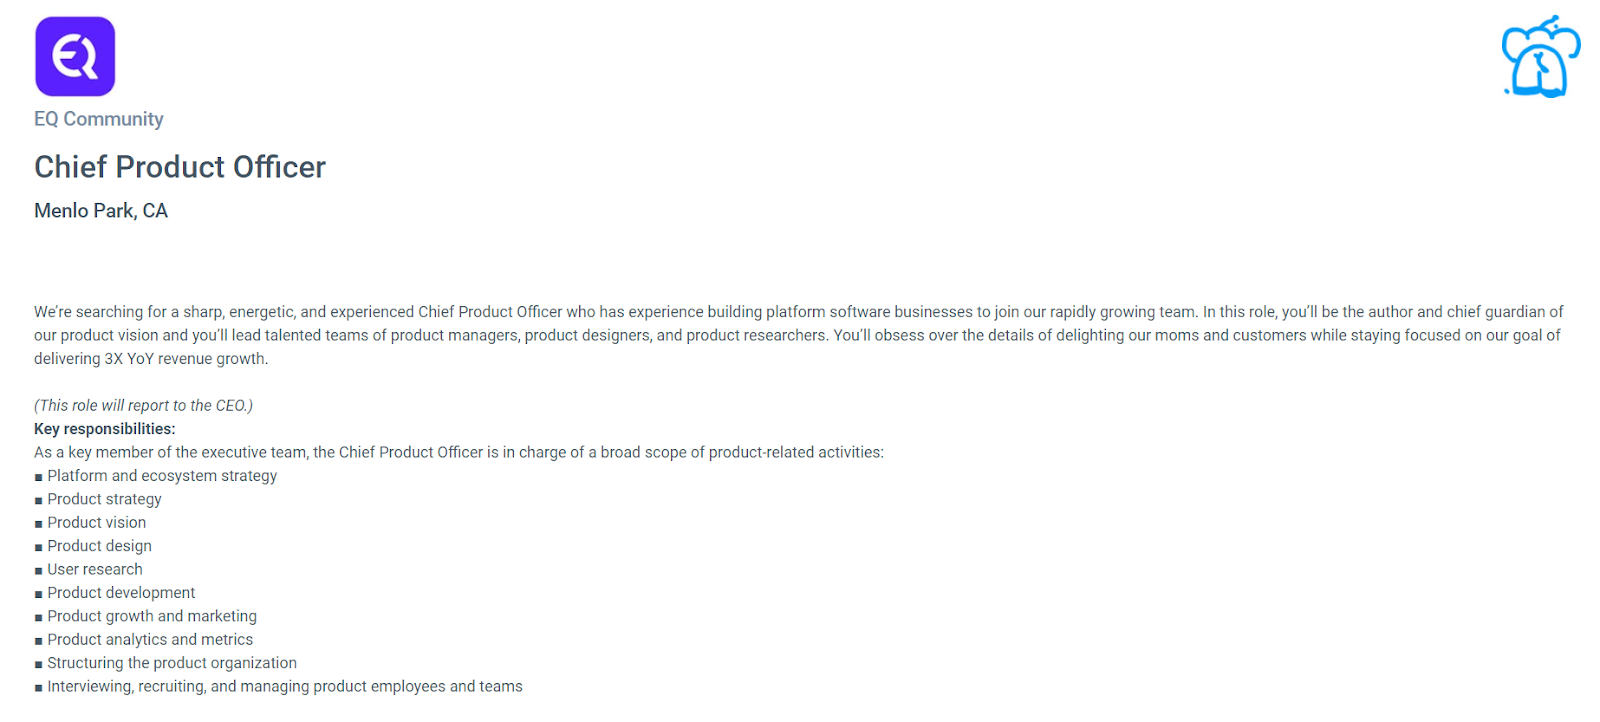
Users can see the exact content selected from the Position View in the Job Posting. If the section is blank or not visible then it will not be shown.
*Note: Compensation and Location sections contain labels for fields that have data in them. No other sections have labels.
Update Job Post
Users can change the Job Post Settings by selecting or deselecting the choices in the side panel and clicking “Save”. In this example, “Firm Team” was deselected and the Update button becomes visible.
*Note: The link does not change when updated, just the details inside of the Job Post.

Delete Job Post
Users can remove the Job Post by clicking the Delete button. There will be a notice displayed at the top of your screen once you confirm deleting the Job post.

