GDPR/CCPA Privacy Policy
Privacy Policy Implementation
In this article, we will walk you through creating, managing, and maintaining your privacy policy compliance in Clockwork, and sending your Privacy Policy to people for consent to use their information and data. These processes are important for tracking and verifying compliance with GDPR / CCPA privacy regulations for the management and protection of people’s private data.
The Privacy Policy Implementation outlined below is an example, not an actual, privacy policy, consent process, and data management practices for your search firm. For more information on drafting a Privacy Policy or reviewing your current GDPR / CCPA compliance and practices, we suggest you speak with our partner, ComplyGDPR.
Set Up
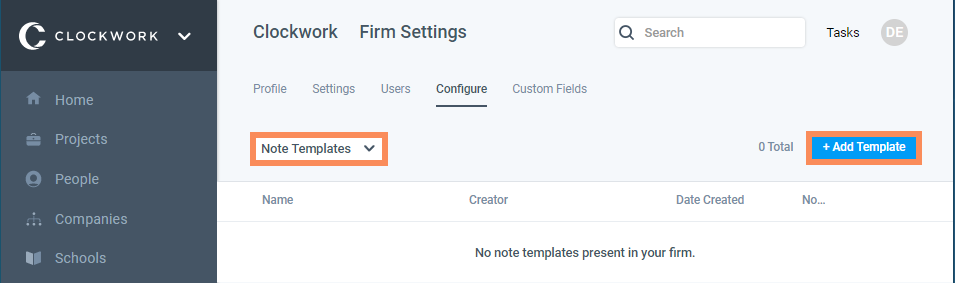
To start, you will likely need a Privacy Policy Notice template to send to people for their consent. Navigate to Firm Settings and the Configure tab. Click the drop down and select Note Templates to create the template for your Privacy Policy Notice.
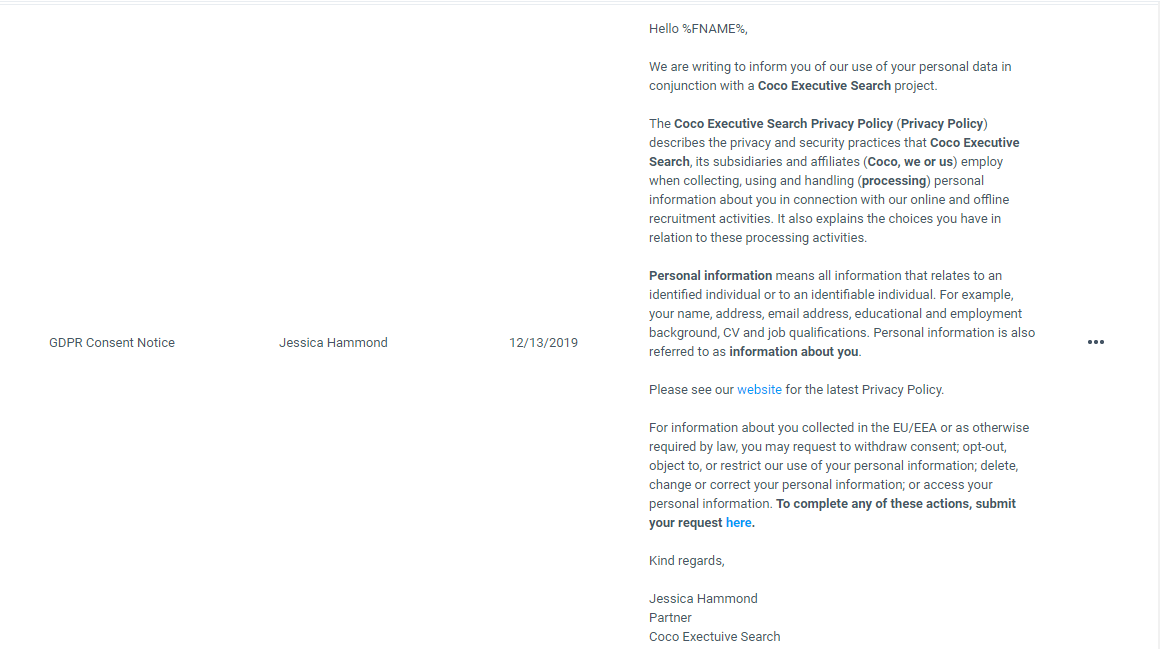
**The following email is a template version that was created as a point of reference.**
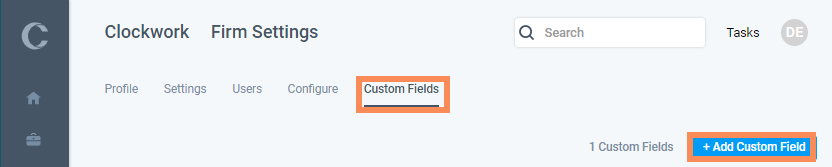
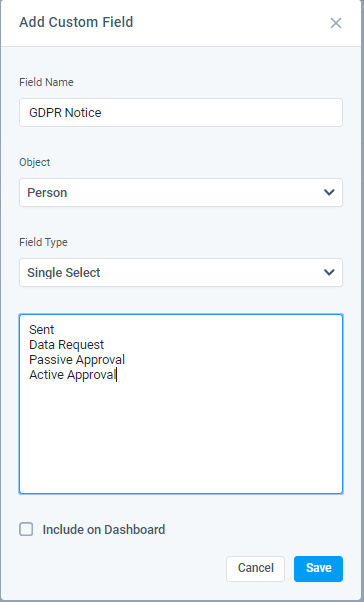
Next, you will likely want to record the status of the notice and their consent. Staying in your Firm Settings, click on the Custom Fields tab, and create a Custom Field with the Object as People. The Field Type should be Single Select with the text field identifying the stages of your policy that need to be recorded against a Person Record.
In this example, if a person has asked for their data to be removed there will no longer be a Person Record in the system for them. All notes and associated values will be lost. For cases such as these it is critical that a record of our interactions are stored in a separate system in order to prove compliance, should we need to, at some later date.
Execution
If your privacy policy requires that you confirm approval from newly added Persons in your database at a regular cadence, say 30 days, follow this process to execute.
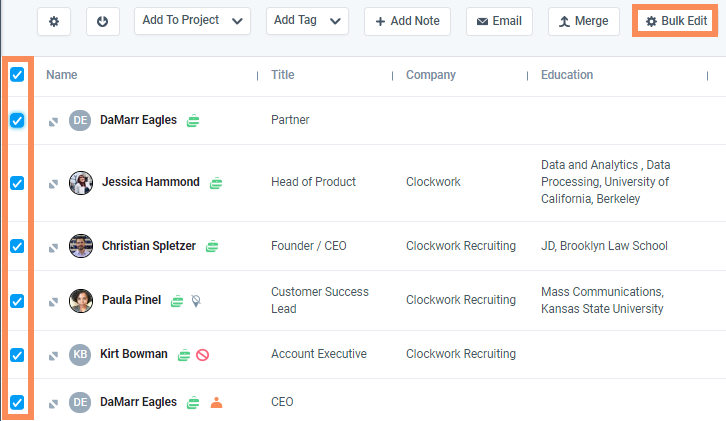
In the People page, filter the candidates that were added in the last 30 days.
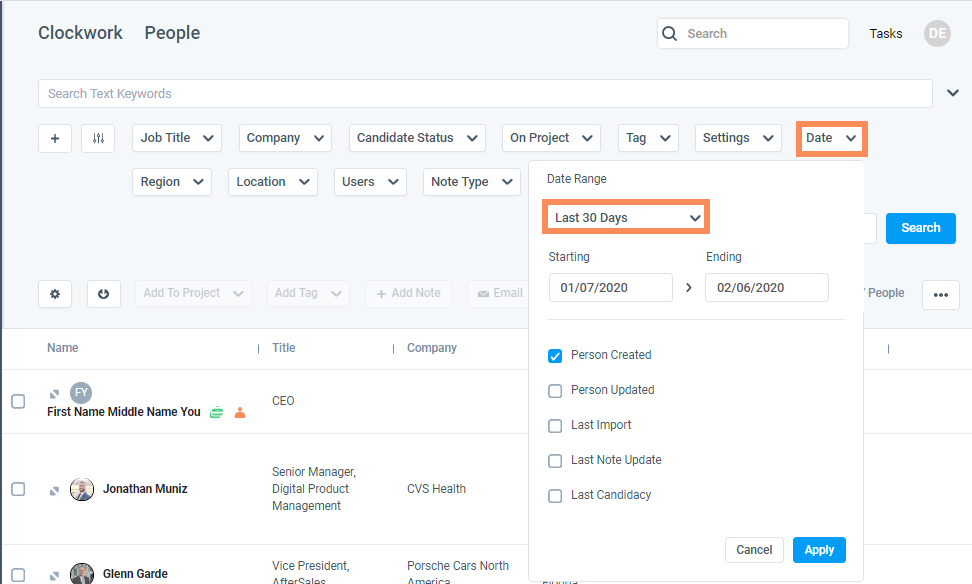

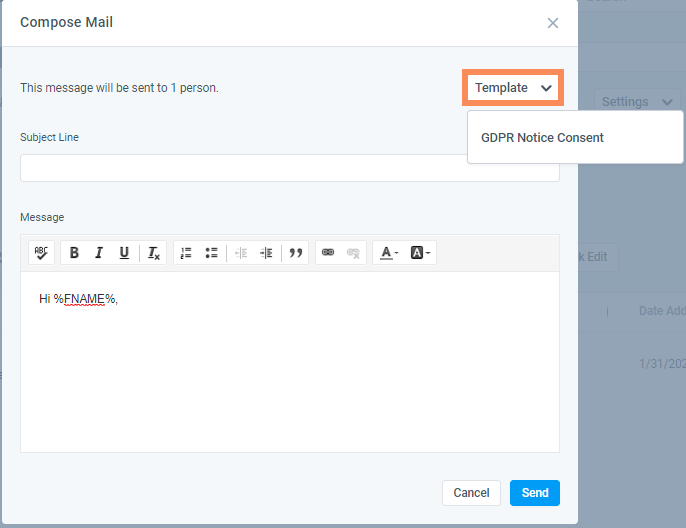
Select all People in the filtered table and click “Email” and select the Privacy Policy Template. The Subject Line does not auto-fill, so users will have to fill that in on their own.
Using %FNAME% will place the correct name in the email when sending to more than one person.
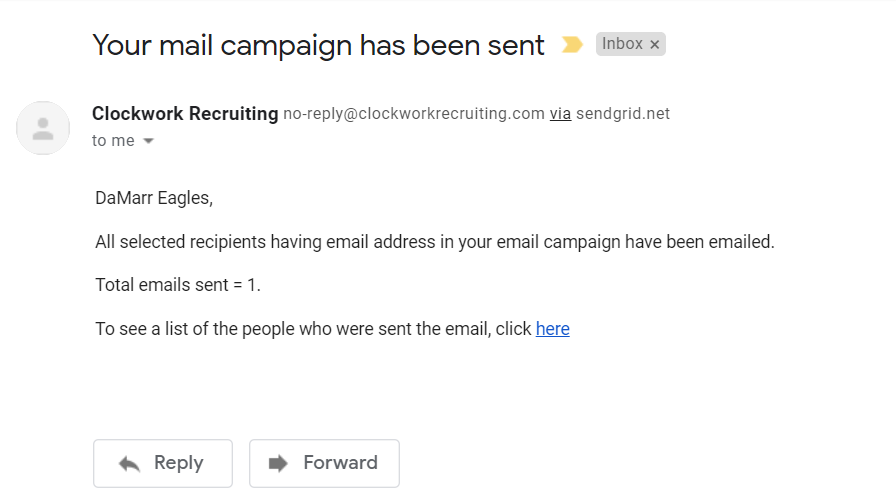
Once the emails are sent then you will receive an email confirmation when complete. The sent privacy notification email will also show in the Notes section of the respective Person records.
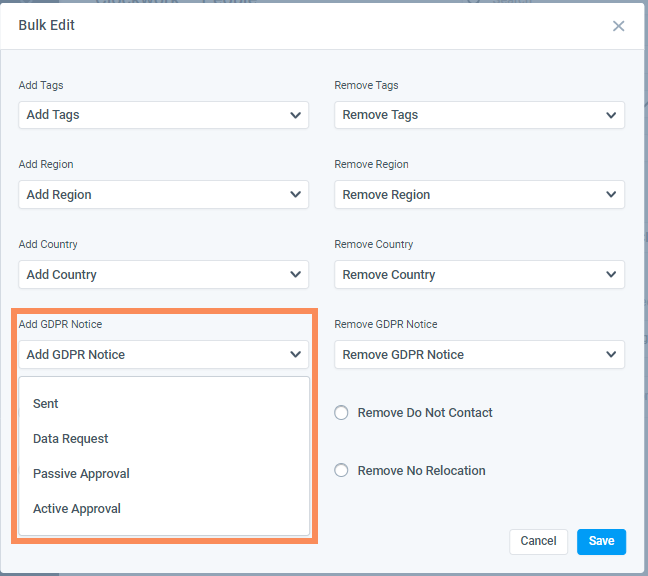
After sending the email to the Person Records, select all the people in your filtered view using the same filter criteria. Then, click “Bulk Edit” and select the appropriate Privacy Policy value to mark the candidates accordingly and click “Save”.

**Please do not leave the page until the process has been completed.

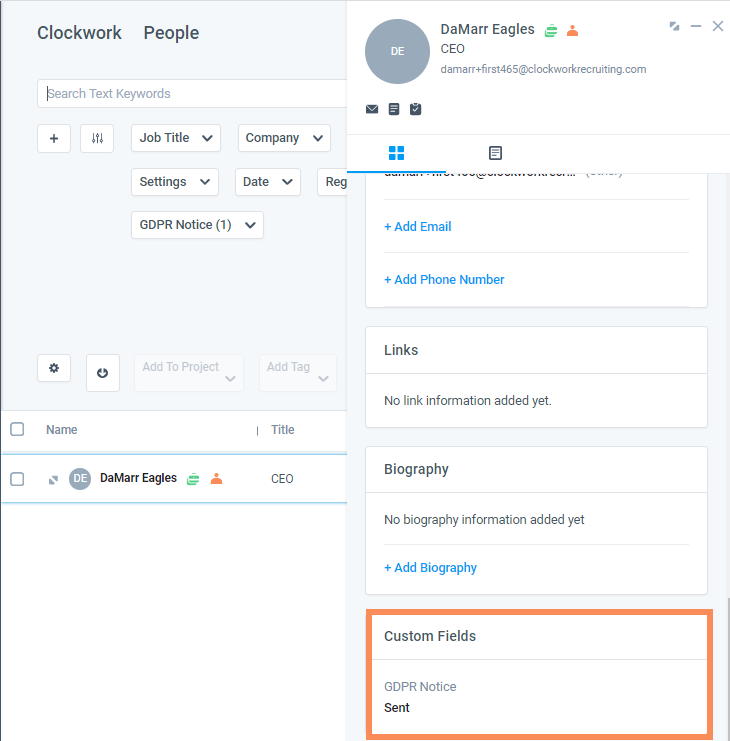
Users can check and edit the status of the Privacy Policy field in the People & Candidates Panels.
**In this example, if the Person has no reply for more than 30 days then it will be considered Passive Approval.
Maintenance
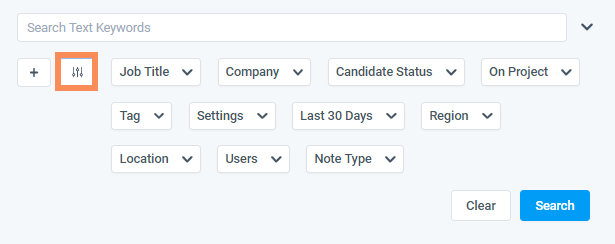
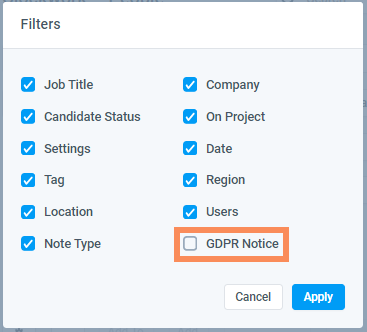
Users can sort candidates with the “Privacy Policy” filter. You can have this filter show by clicking on the Filter button and select the “Privacy Policy” and apply.
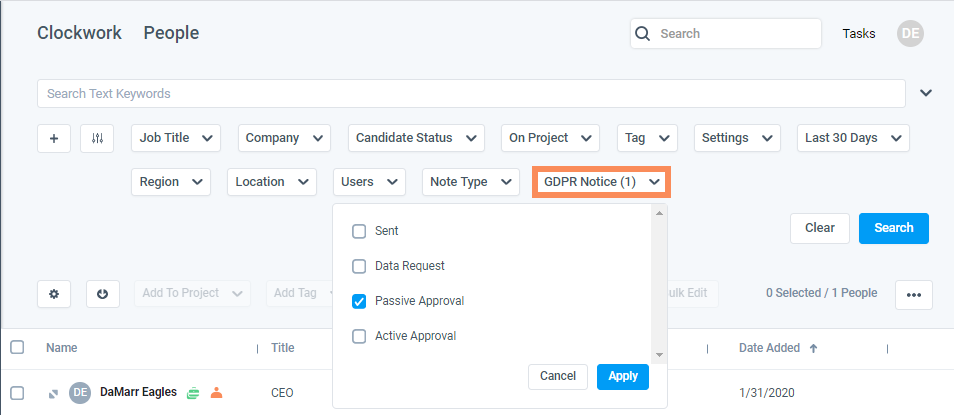
For the purposes of our example, People who have not responded after 30 days are considered Passive Approval. Users will have to update this field. Select all appropriate Person Records, click “Bulk Edit”, Passive Approval and “Save”.
A helpful tip: Create a recurring calendar invite for 30 days for tracking.
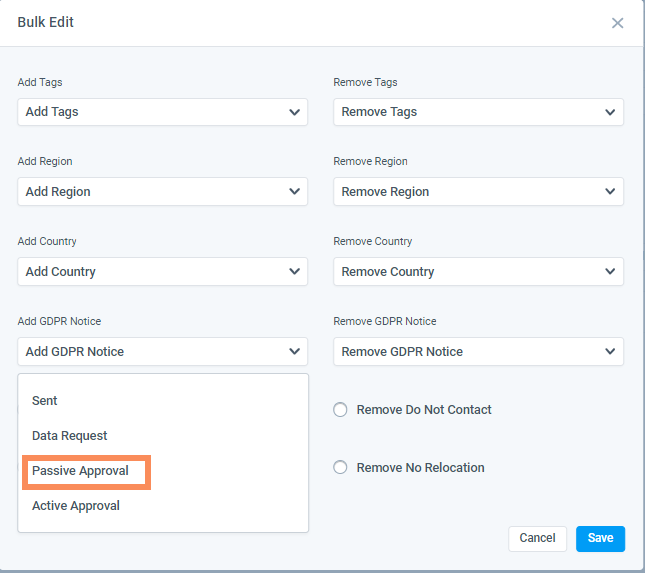
In the case that a Person responds with the approval of the “Privacy Policy”. Select that candidate in People, click “Bulk Edit”, select Active Approval and “Save”. You can also edit this specific Person Record in the Person Record or People Panel, Custom Fields Section.

Data Provision
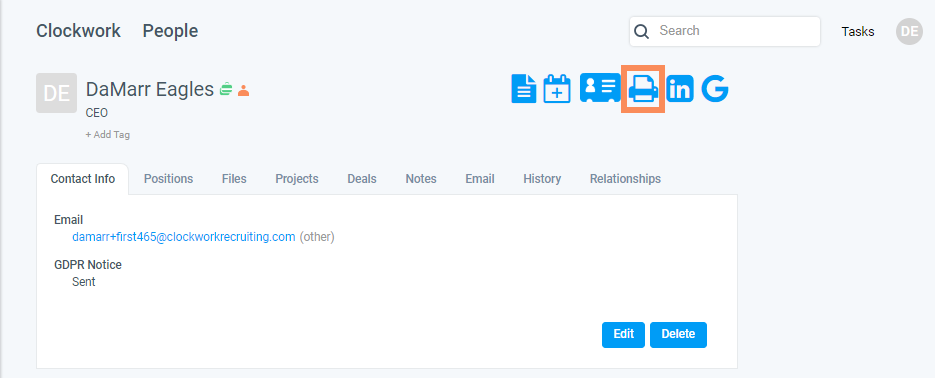
Data requests from a Person can be completed by going to their Person Record and selecting the “Printer” image. The page that is emailed to you is all the Person Record data from Clockwork. Forward that to the requesting Person for their approval or denial.
If a Person does not approve of the use of their data then they will have to be deleted from the application. It is suggested that the Person replies outside of Clockwork for recording purposes.
Removing Person Records
If a Person does not consent to the Privacy Policy then you will have to remove their person record from your firm.
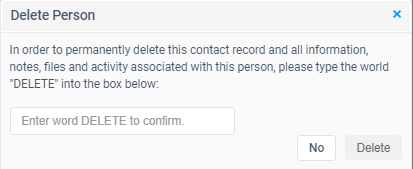
In the People page you can select the Person you want to remove, or you can search for the Person in the quick search at the top of the screen. In the Person Records click “Delete”.
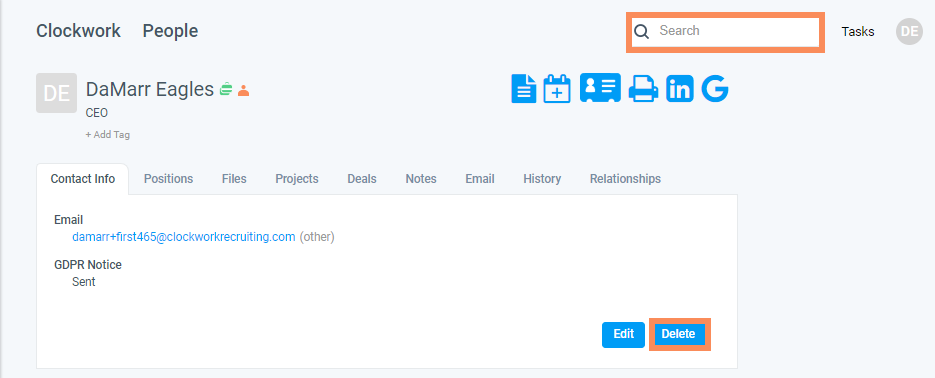
A confirmation window will appear asking you to type out the word “DELETE” in order to remove the Person Record.
Note that Clockwork is not an expert legal authority on GDPR, CCPA or other Privacy Policy regulations. Seek outside counsel for further questions or concerns.